Ise Jingu Guide: Our Experience and What to Know Before You Go

Last Updated on March 17, 2026 by Kay
This post may contain affiliate links, meaning I may earn a small commission on any purchases through those links at zero additional cost to you. Whatever I make goes to keeping this website running and I am forever grateful for the support. See my Privacy Policy for more information.
Ise Jingu is the most sacred Shinto shrine in Japan, which is why it’s essential to be prepared before you go. I’ve lived and traveled in Japan for almost two decades, and even I found it very different from any other shrine I’ve visited. (And intimidating. Also, a little overwhelming. There are rules, my friend.)
Don’t let that scare you from going, though. My brother found it to be one of the best experiences he had in Japan. So in this article, I’ll cover what is was like to visit Ise Jingu so that you can decide whether you want to see it to begin with, and that there are no surprises if you go.
Table of Contents
Why We Visited Ise Jingu
Ise Jingu, pronounced “ee-seh jeen-goo,” is located in Ise-Shima National Park in Mie Prefecture. It’s considered the most important shrine in Japan for the Shinto religion and is extremely sacred.
Established around 2000 years ago, Ise Jingu worships Amaterasu Ohmikami, the goddess of the sun, who is also the highest-ranking god in Japan. In fact, it’s believed that the Emperor of Japan and his ancestors descended from this god. This is why Japanese people make pilgrimages to visit Ise Jingu and pay their respects.
This shrine was somewhere my mother-in-law had wanted to visit all her life, but unfortunately, she couldn’t go due to lifelong health problems, so my husband and I decided to go for her. (And we dragged our daughter and my brother along for the trek.)
To be honest, as a foreigner, I felt a little strange going to a shrine that’s so important to Japanese people. In fact, my brother and I were the only foreign people there! But we’re both glad we went because it was absolutely memorable.
What All Visitors Should Know Before Going to Ise Jingu
Ise Jingu is not an international tourist destination. I don’t think it will ever really be, as it’s very sacred for Japanese people. This doesn’t mean you shouldn’t visit or that foreign tourists are not welcome (otherwise I wouldn’t be writing this article), but there is little to no signage in English, and I can’t see that changing anytime soon.
All signs at Ise Jingu are in Japanese only, which can make it tricky to know what to do or even where to go for visitors who can’t read the language. (Although some signs have pictures, as shown below.)
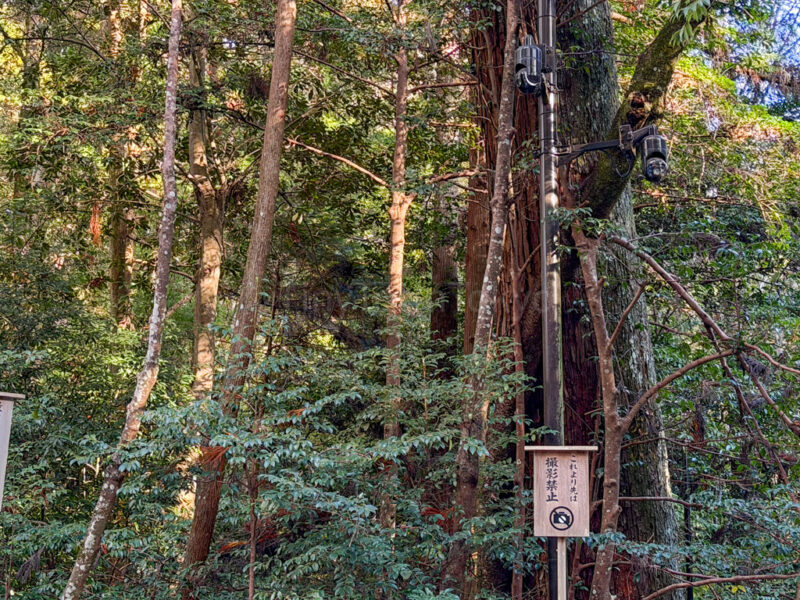
The sign in the image above reads, “No photography beyond this point”.
As the photo above hints, there are also many rules regarding where you can take photos, eat, or drink, and the signs can be hard to spot. Thankfully, these restrictions are all only for the main sanctuaries (Geku and Naiku), which I’ll explain later.
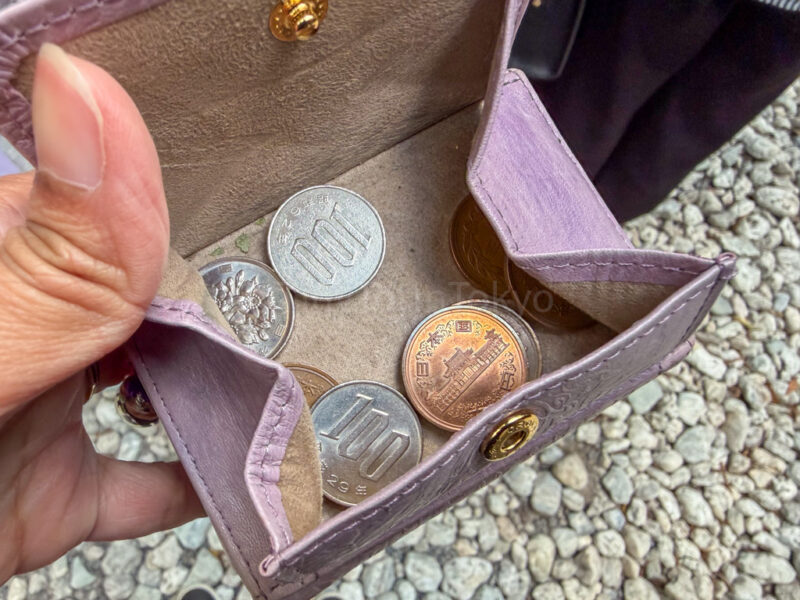
Also, bring coins if you plan on praying. Lots of them, because there are a lot of shrines here. I ended up having to borrow coins from my brother!
Hopefully, by the end of the article, you’ll have enough knowledge about what to expect so there won’t be any surprises.
Our Experience at Ise-Jingu
Ise Jingu is a very subtle and subdued shrine, a perfect representation of the Shinto religion. So if you’re expecting to see something very large, colorful, and “photo worthy”, you won’t find that here. Taking a few photos here and there is fine, but I wouldn’t treat Ise Jingu like a place for a photoshoot. It’s first and foremost a place of worship.
The Difference Between Geku and Naiku
In total, Ise Jingu has 125 different Shinto shrines, but these shrines are scattered across an area so large that it would be impractical for most visitors, not to mention that the public cannot even access some of these shrines. This is why visitors focus on the main sanctuary, which is divided into two areas: Geku (Toyouke Daijingu) and Naiku (Kotaijingu).
Geku is the outer shrine or sanctuary, while Naiku is the inner shrine. You need to either drive, take a cab, or bus to get from one to the other.
Within the area for each shrine, there is also lots of walking involved, so make sure you wear good shoes.
Interestingly, ever since 690, both Naiku and Geku have been moved nearby and reconstructed every two decades. The last reconstruction was in 2013, and the next one will be in 2033.
Should You Visit Geku or Naiku First?
Traditionally, you should visit Geku, the outer shrine of Ise Jingu, first before going to Naiku, the inner shrine. This is what we did.
The reason for this is that all the traditional ceremonies held on the shrine grounds occur at Geku first.
Now, you won’t be in trouble or anything for going to Naiku first, but after following the traditional route, I can see why Geku first is recommended. Naiku is definitely the more impressive area, so coming from Geku, it felt like a grand finale of sorts, if that makes sense.
If you really don’t have much time at Ise Jingu and can only choose one, I recommend going to Naiku over Geku.
Visiting the Geku Shrine
After parking, we crossed a small bridge called Hiyoke-bashi. It’s important to enter by walking on the carpet on the left side of the bridge. Do not walk on the wooden part of the bridge in the middle that doesn’t have carpet. Otherwise, you will be cursed with bad luck.
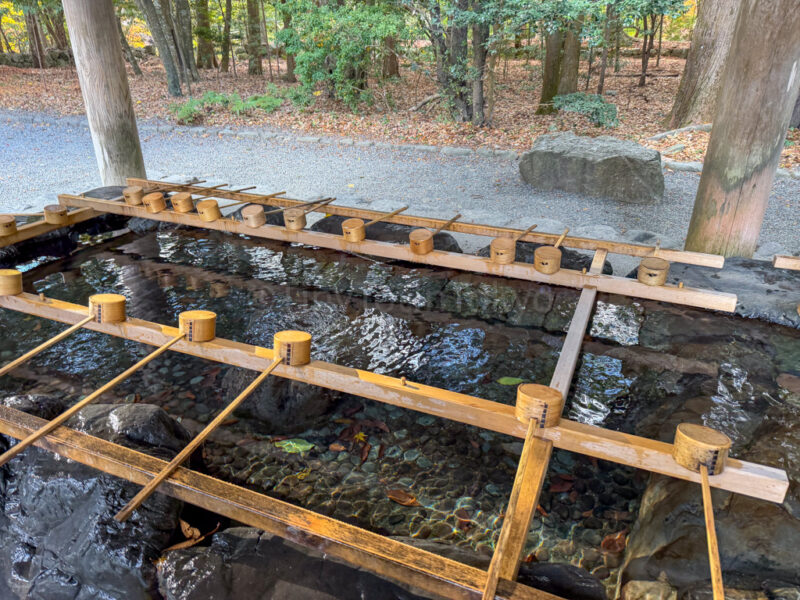
Once crossed, we were in an open area that had a place to wash our hands (temizusha). I highly recommend doing this (and bringing a handkerchief) as cleansing your hands at a shrine is an important step when paying your respects to the Shinto gods.
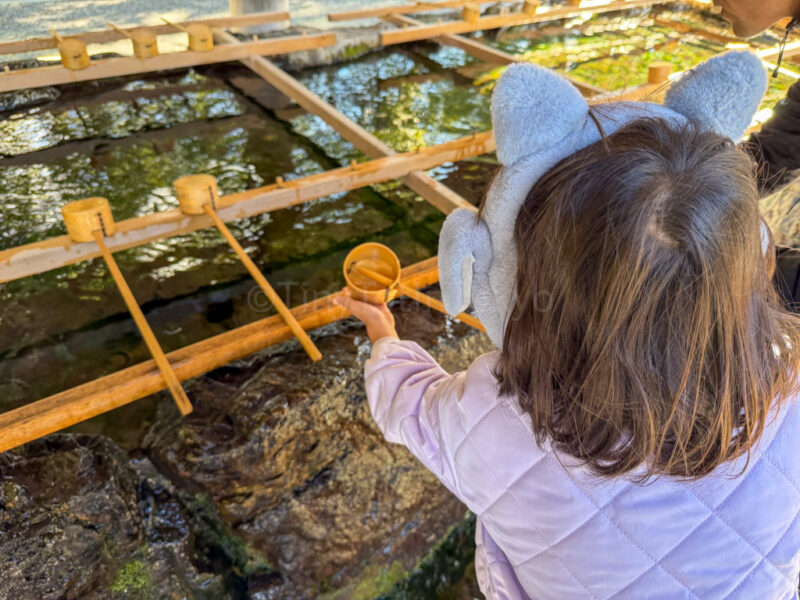
Use the ladle to scoop up some water and then pour it over your left hand and then your right hand. Some people also pour a little bit of water into their left palm and then touch it to their lips, and then pour water from the ladle on their left palm to cleanse it. When you’re done, hold the ladle upright so that the water drains down and cleans the handle.
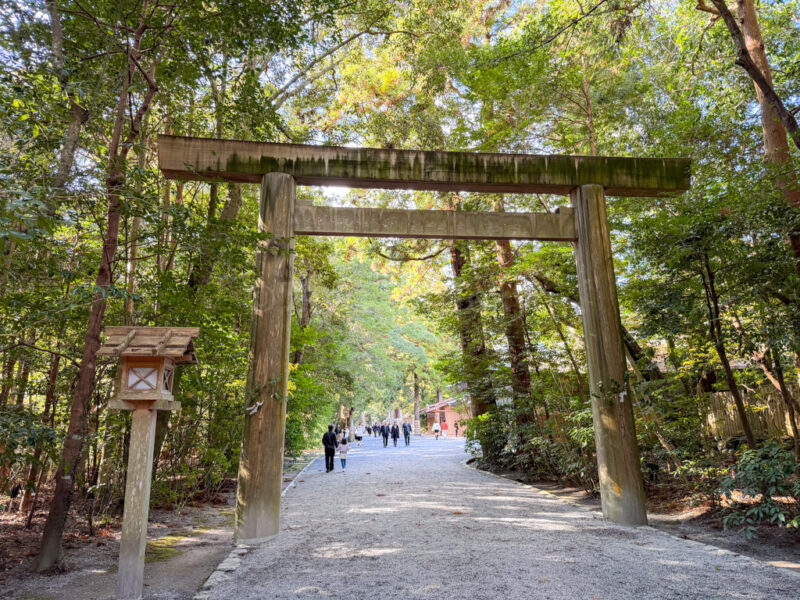
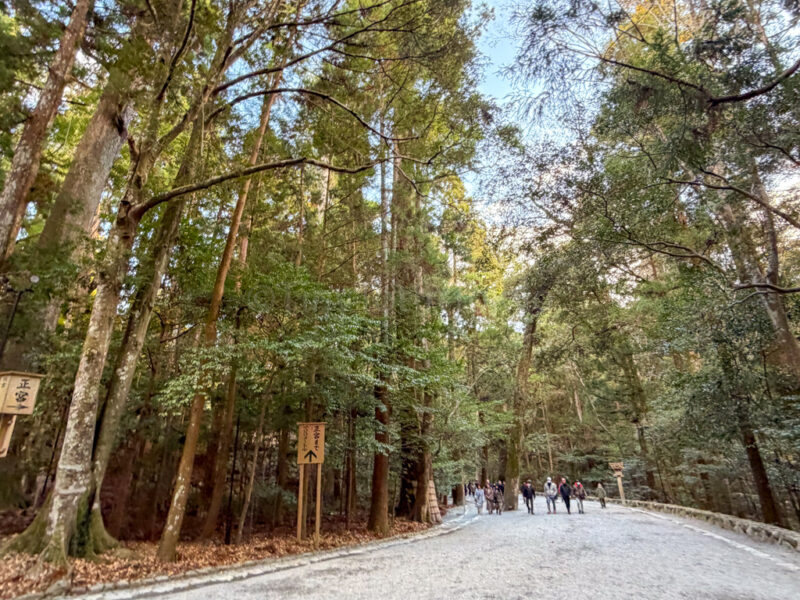
After we washed our hands, we passed through a large wooden torii gate. Unlike many torii gates in Japan, this one wasn’t vermillion. This would be a continuing pattern when it came to structures within the shrine grounds. Nothing is flashy, and instead, all consists of undyed wood, blending in beautifully with the deep green trees in the medieval forest.
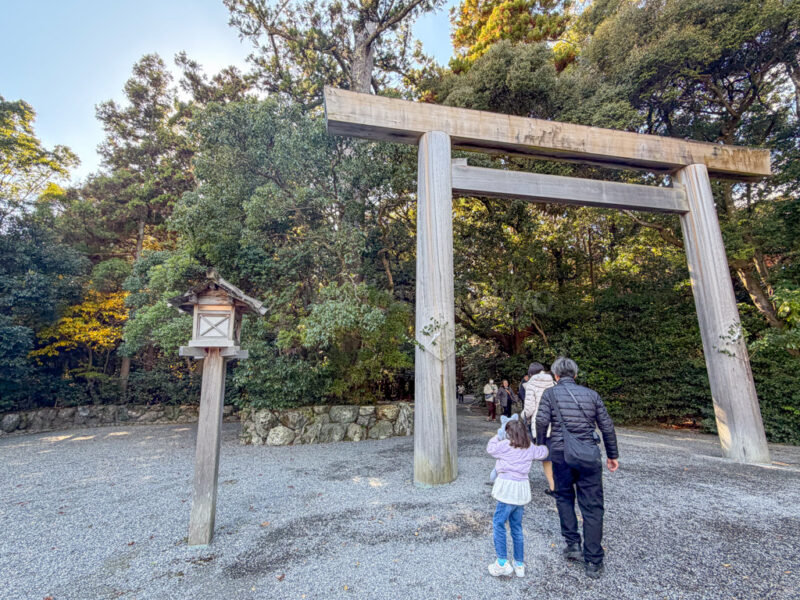
After crossing the first torii gate, we crossed another even larger one about two minutes later. This one was stained with moss at the top.
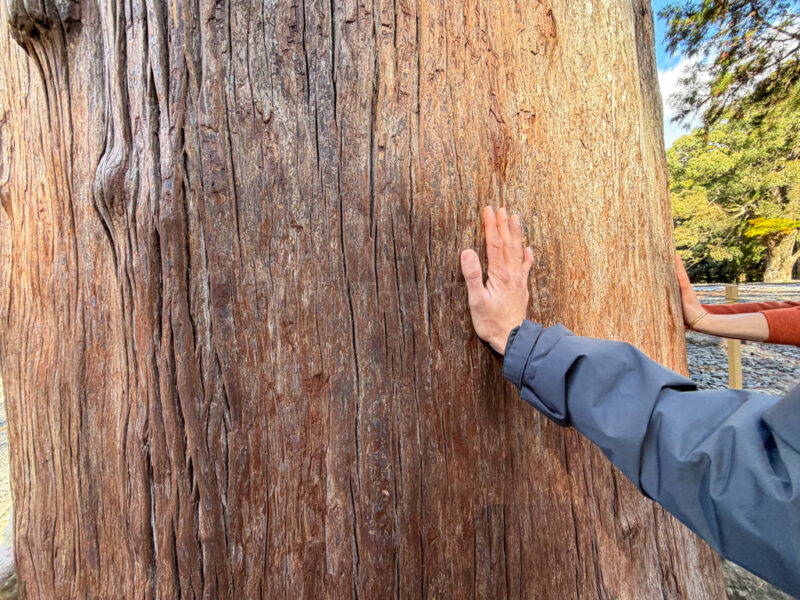
Many people were touching or hugging the larger trees in the forest, which were thousands of years old, so we did the same. By doing so, it’s believed that you can get power from them. This makes sense as Shintoism believes that nature is sacred and inhabited by god.
(I suggest touching the tree rather than hugging so that you leave enough room for others to do the same.)
The Geku shrine is right next to the large trees and is located at the end of the clearing, so from the first torii gate to Geku, it takes less than 10 minutes on foot.
Unlike many other shrines in Japan, you don’t need to pay a fee to enter.

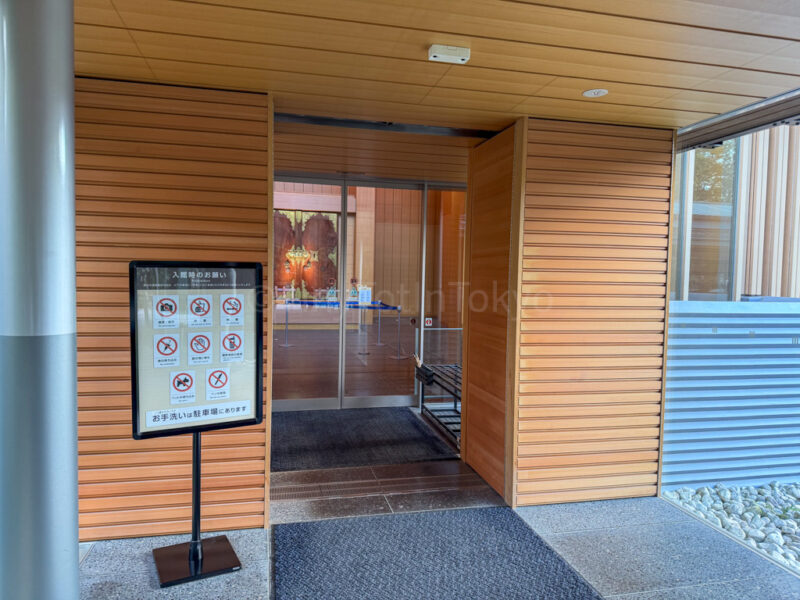
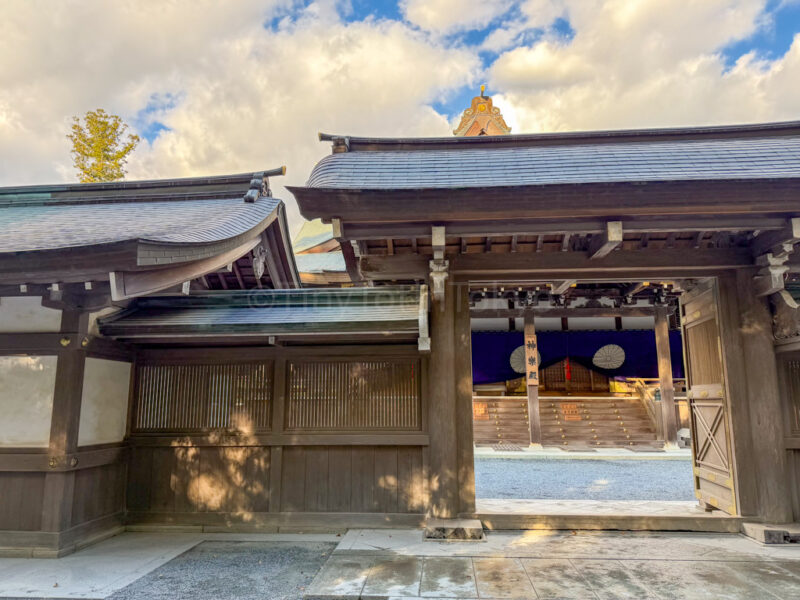
Geku is located behind yet another torii gate. However, it is essential to know that you absolutely cannot take photos after you pass through this gate (pictured below). There is a security guard inside, and he does enforce the “no photos” rule. This is why you’ll see people standing back and taking photos right before going inside.

Also, you cannot see the main sanctuary of the Geku shrine, only the outer part (pictured above), as it’s considered too sacred for everyday visitors.
Other rules include no food or drinks, and absolutely no smoking.
Geku is dedicated to the god Toyouke Daijingu, the god of food, shelter, and clothing, who also gives food to Amaterasu Omikami. Originally, this god was enshrined in Kyoto but was moved to Ise Jingu about 1500 years ago.
After tossing a coin into the offering box, called a saisen bako (anything from a 1 yen coin to bills, but of course, the bigger, the better) and praying, we went to the minor shrines that surround Geku. There is a dedicated path for this, but if you’re confused, just follow where everyone else is going.
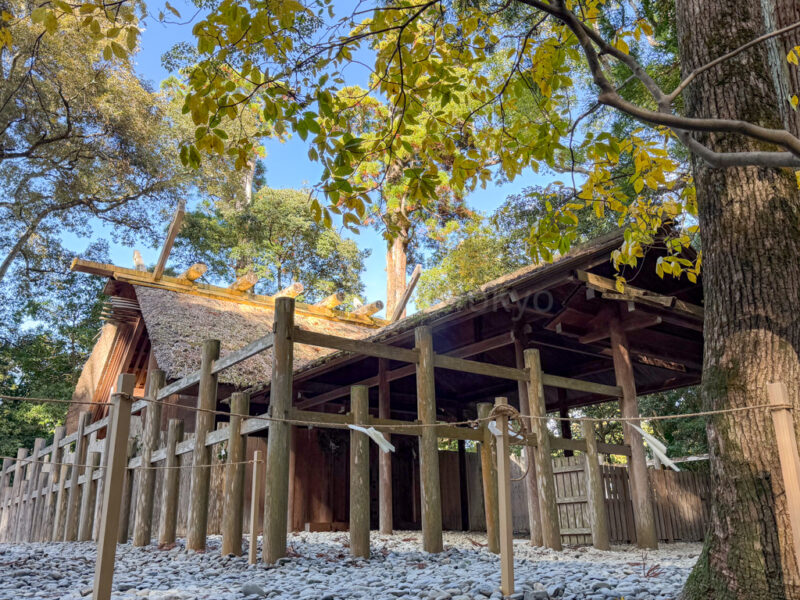
Below are some of the smaller, auxiliary shrines we came across in Geku after leaving the main sanctuary. We gave coins and prayed at each one, so make sure your wallet has plenty of coins in it if you want to pay your respects (again, even 1 yen is okay!).
Kazenomiya
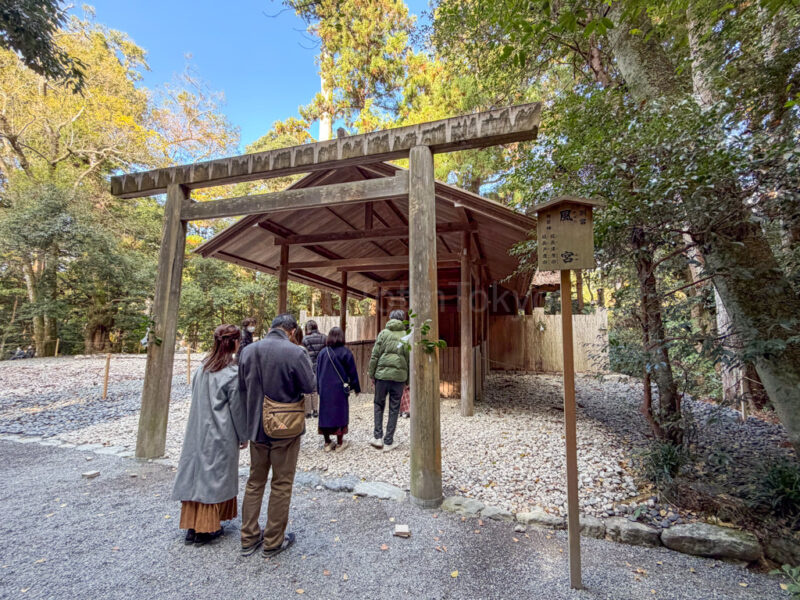
Kazenomiya (風宮) is a sub-shrine that is home to the gods of wind. People, especially those in agriculture, come here to pray for good wind and rain. It’s believed that this shrine helped create wind that protected Japan when Mongol invaded.
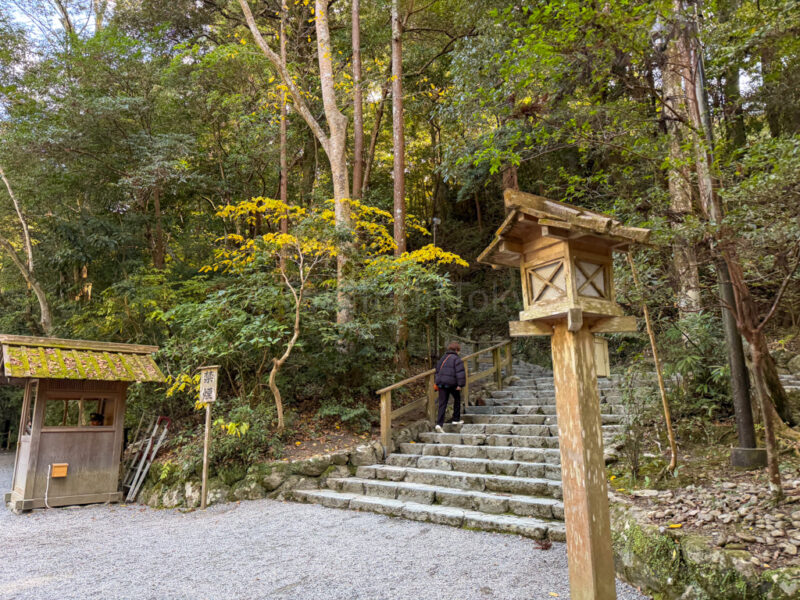
Takanomiya
Takanomiya (多賀宮) is a sub-shrine that’s located on a small hill. You need to climb 100 stone steps, pictured below, to reach it.
This sub-shrine is dedicated to Toyouke no Omikami’s spirit.
Tsuchinomiya
Tsuchinomiya (土宮) is a sub-shrine that protects Geku from flooding. The god enshrined in this sub-shrine has been a guardian of the area even before Geku was built.
We also stopped by Sengukan, a museum about the history of Ise Jingu. It has a replica of what the outside of the main hall looks like, as well as information about how it’s built. There are lots of videos and pictures, but the explanations are in Japanese only.
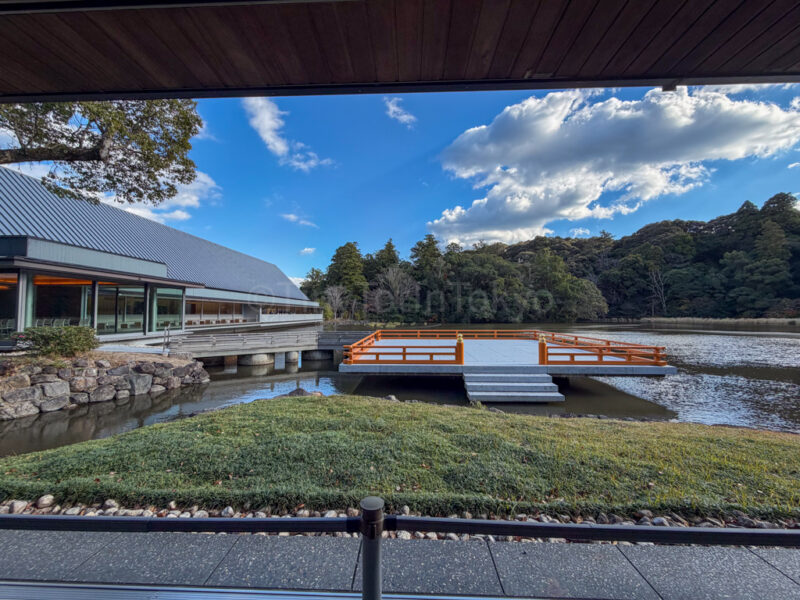
As you can see in the image below, you are also not allowed to take photos in most of the museum.
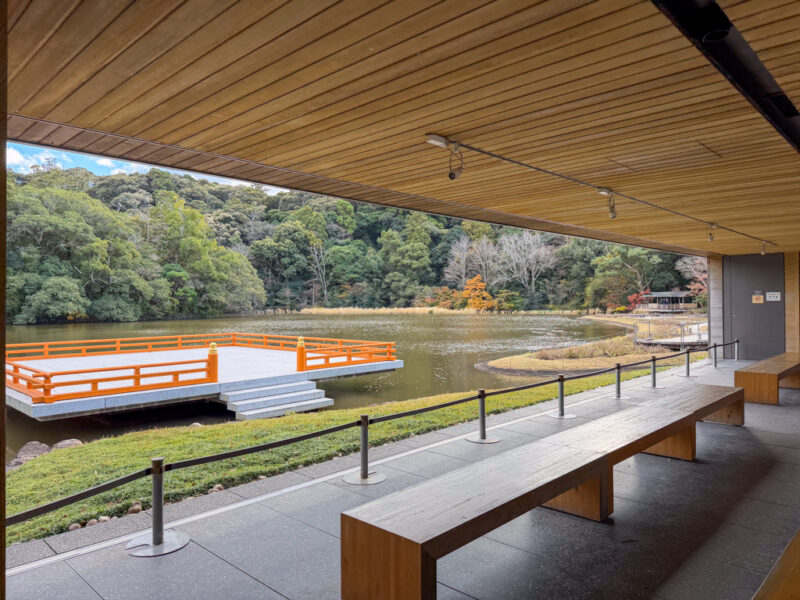
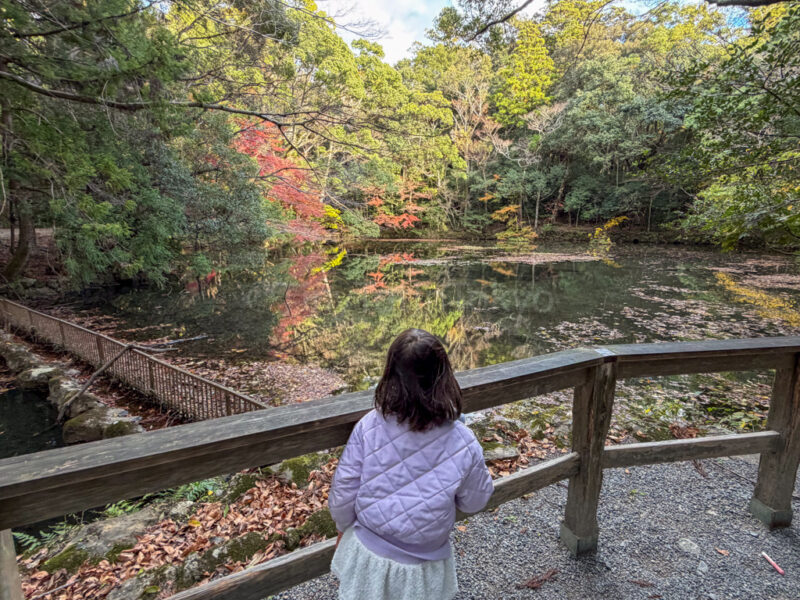
My brother and daughter didn’t want to go in, so only my husband and I visited while they sat near the pond outside and rested their tired feet while enjoying some drinks. My daughter enjoyed looking at the fish and birds in and around the pond as well.
When we were done, we crossed the bridge again, making sure to walk on the left side, and then went to our car to go to Naiku.
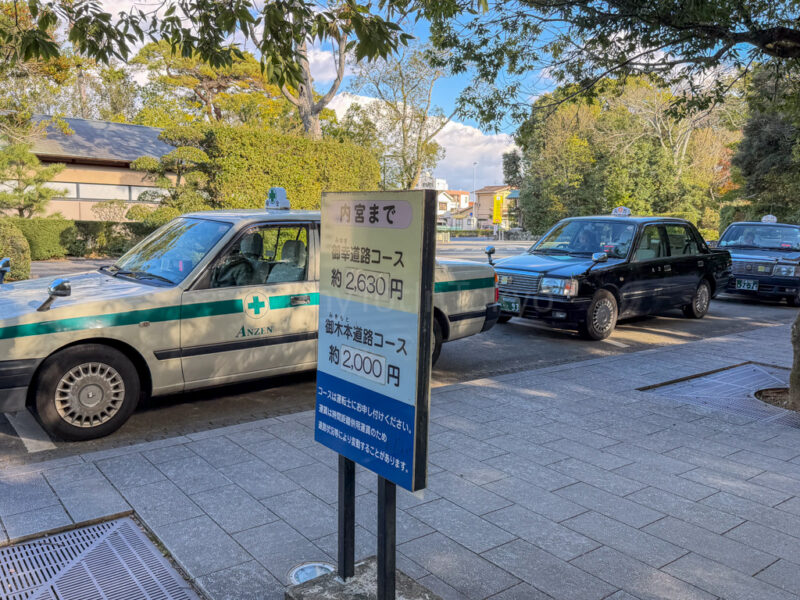
As mentioned earlier, there are plenty of buses and taxis you can use to get there if you don’t have a vehicle. The taxi costs 2000 yen one-way from Geku to Naiku.
Visiting Naiku Shrine
The inner Naiku shrine is dedicated to the goddess Amaterasu Ohmikami. In the past, this goddess was enshrined and worshipped in the Imperial Palace but was moved to Ise Jingu around 2000 years ago.
Naiku is about a 20-minute bus ride (Naiku-mae bus stop) or a 10-minute drive from Geku.
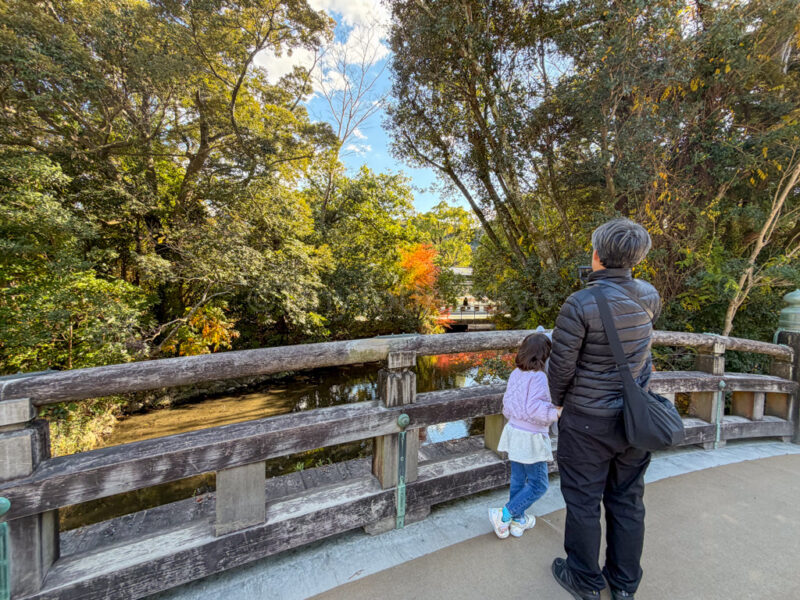
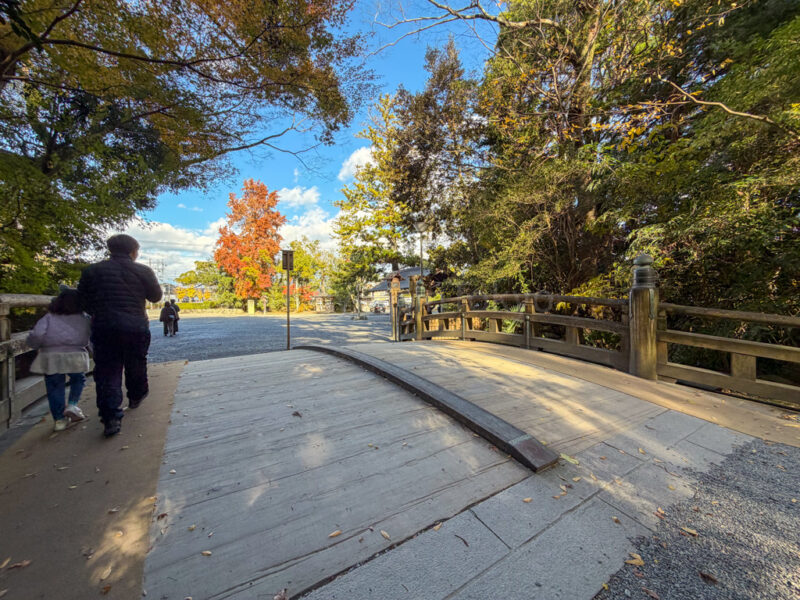
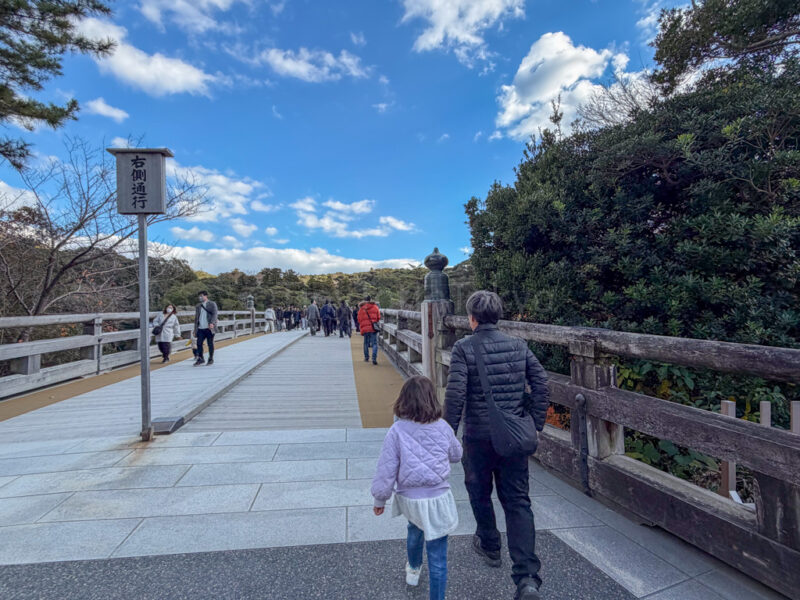
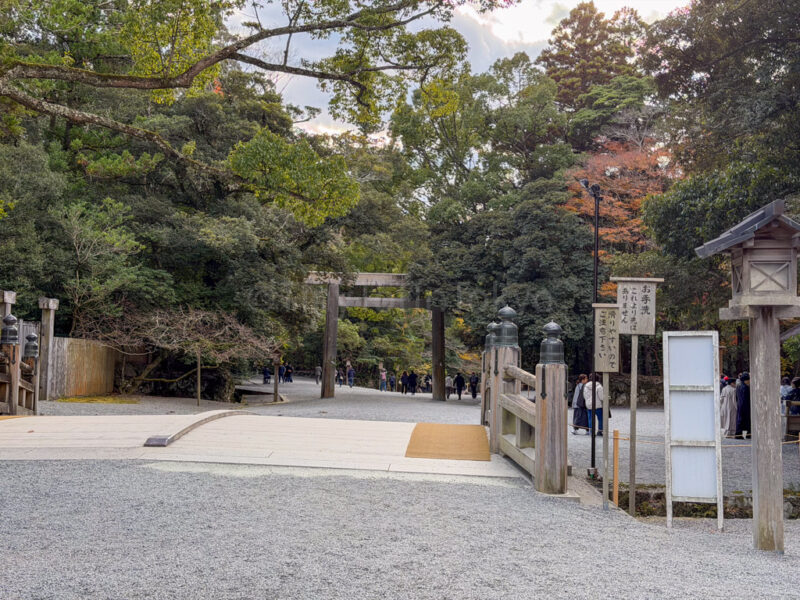
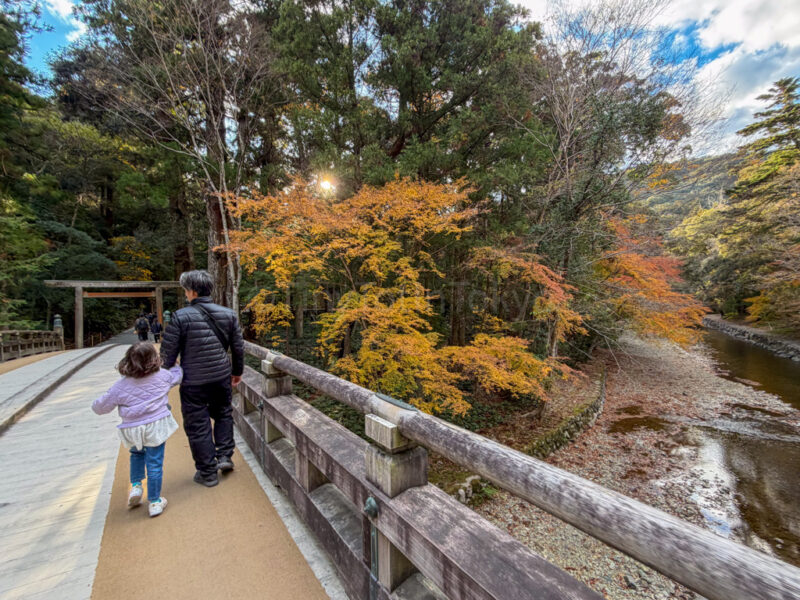
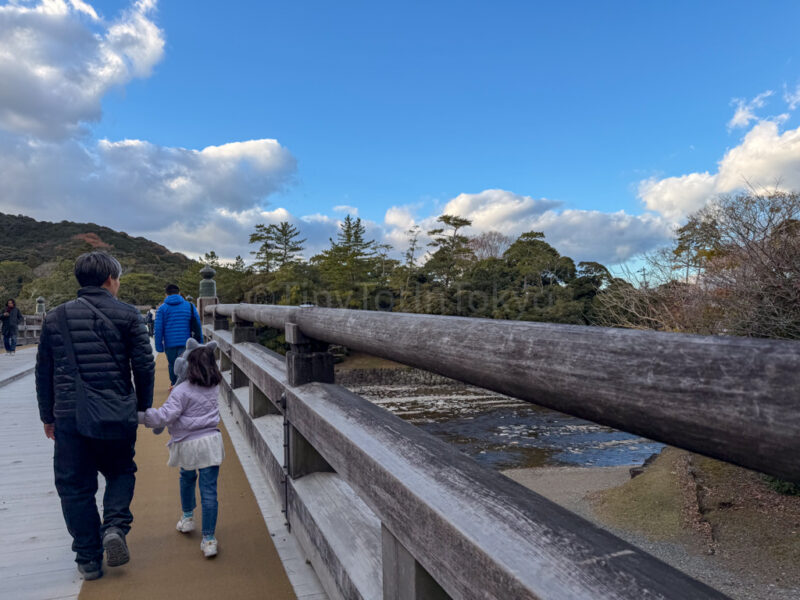
After we arrived by car, we crossed a bridge called Ujibashi. It’s believed that once you cross this bridge, you’ve traveled from the everyday world to a sacred realm. Interestingly, this bridge is also rebuilt every 20 years.
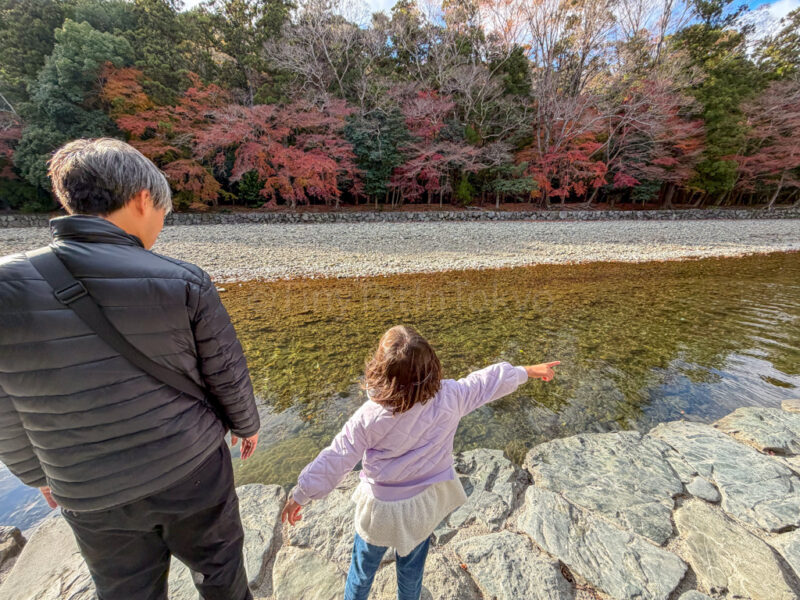
Unlike Geku’s bridge, you need to cross Ujibashi walking on the right side. You should stay on the carpeted part, but as you can see in the image below, not many people were doing that. My husband didn’t want to risk being cursed, though, so he stuck to the carpet on the far right.
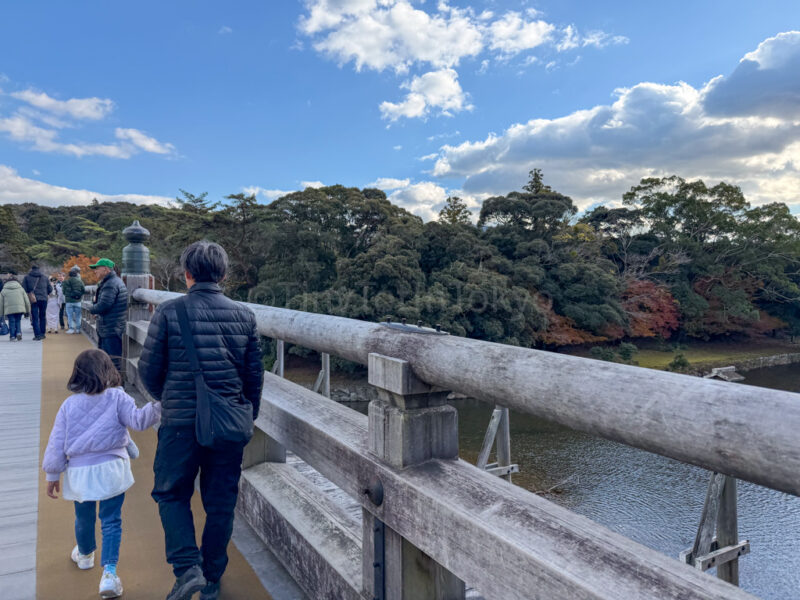
The view from this bridge is absolutely stunning, especially in late autumn when we visited. The autumn foliage was so lovely.
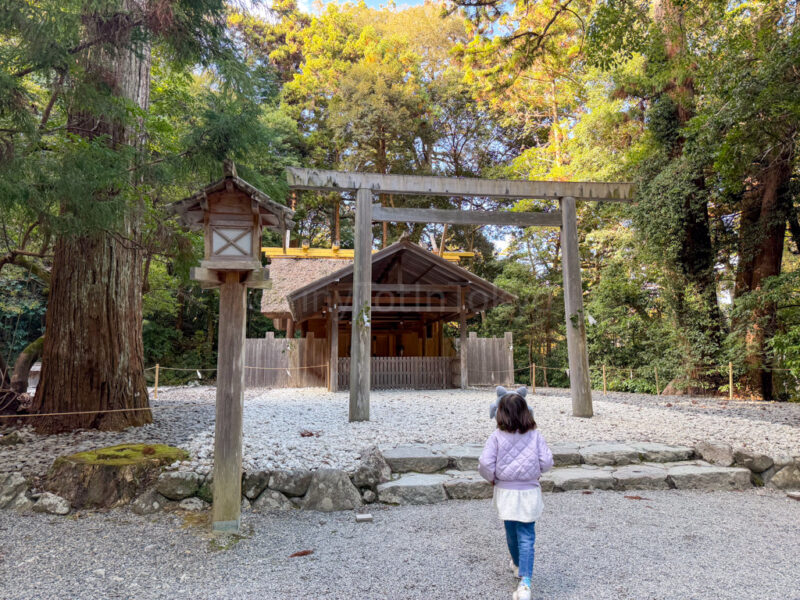
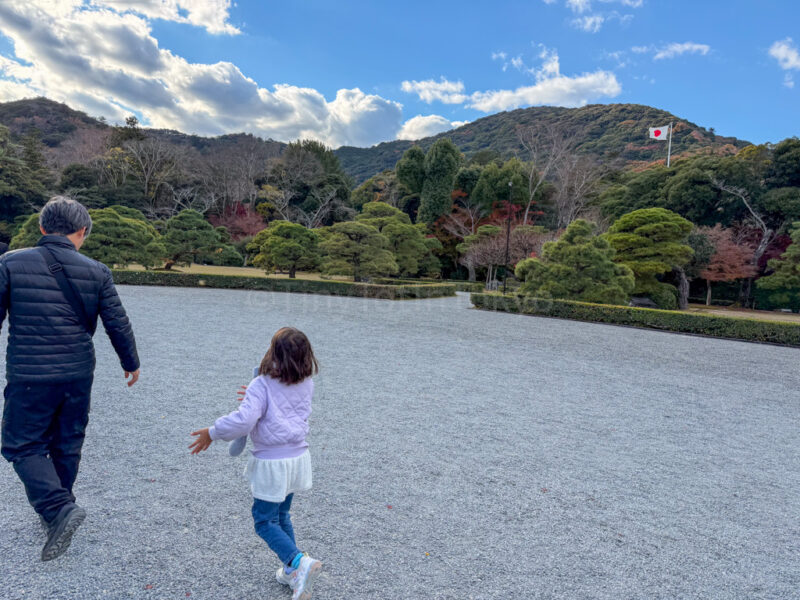
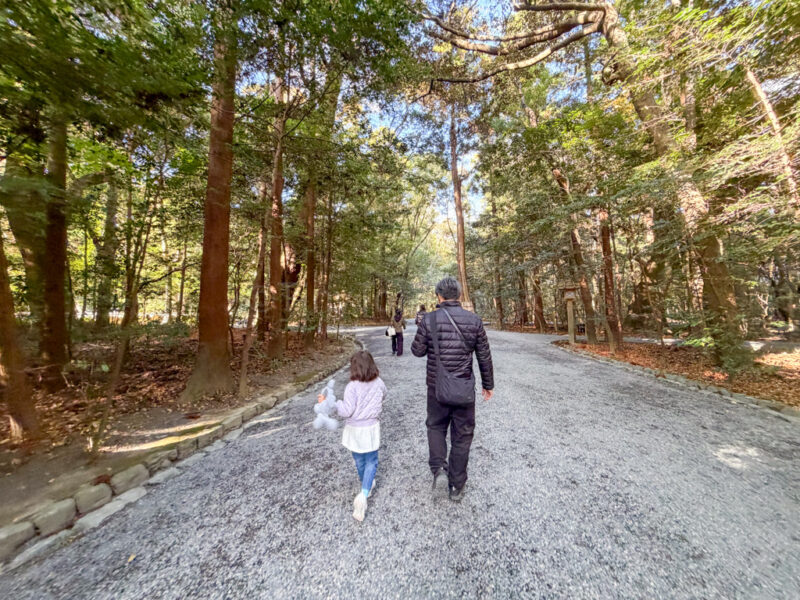
After crossing the bridge (and entering the sacred realm), we found ourselves in an open area with gravel on the ground and Japanese landscaping. This is actually pretty great for kids who want to run around because it’s so wide, as you can see from the photo below of my daughter frolicking.
This space helped it feel a lot less constrained compared to Geku.
We crossed another small bridge (again walking on the right side) and then passed another hand washing area (temizusha) where we cleansed our hands again.
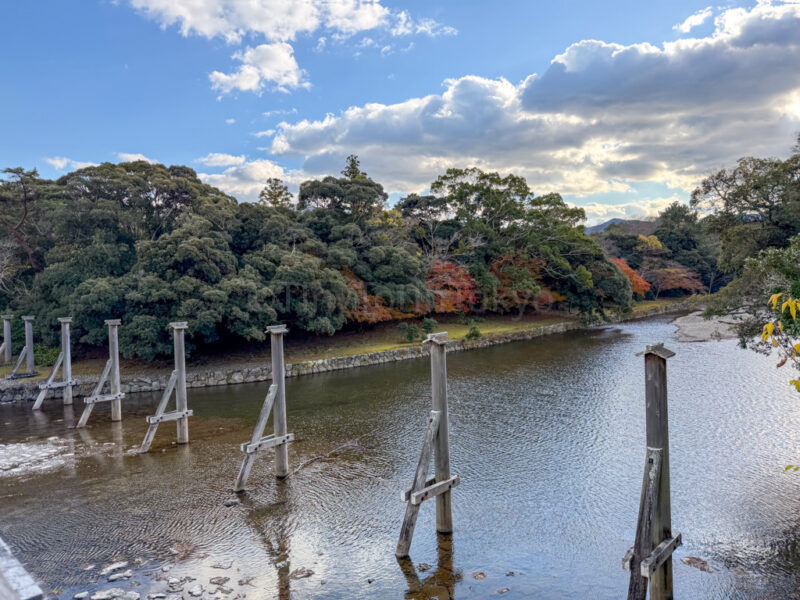
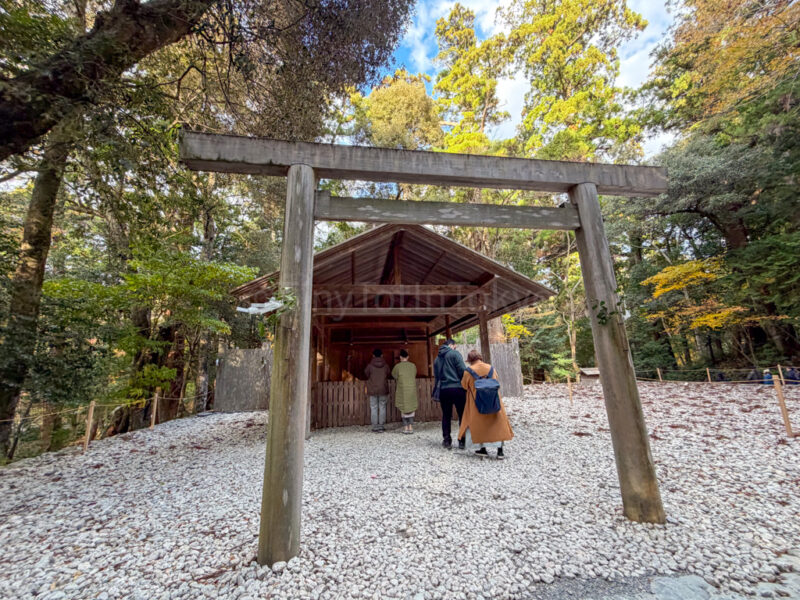
When we were done, we crossed the torii gate and were greeted by a beautiful area filled with trees and a small river called Isuzugawa.
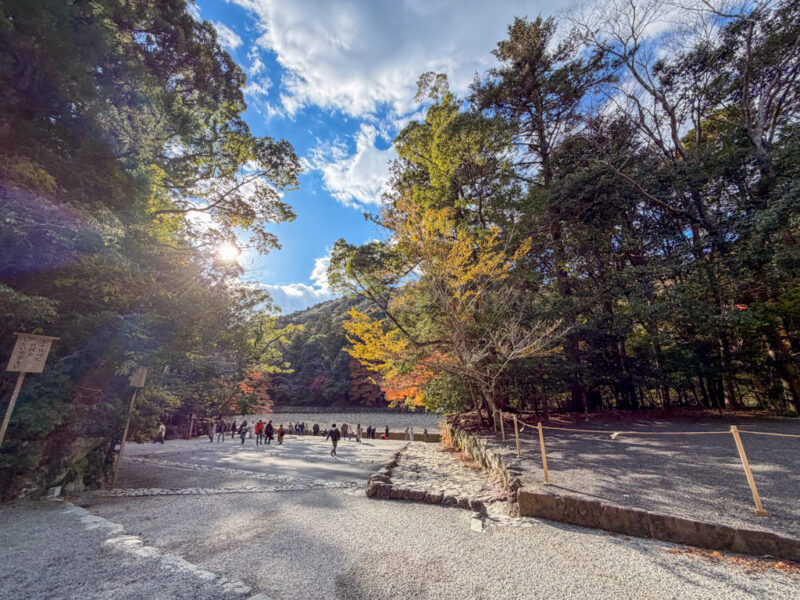
Here you can also purify your hands if you like, although it was quite chilly so we decided against it.
This was a really beautiful area, so we spent a few minutes enjoying the autumn scenery here.
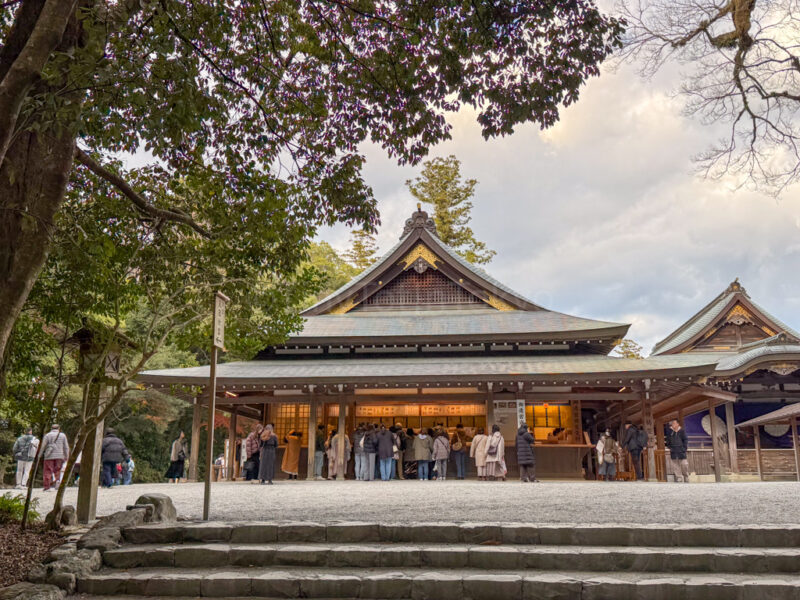
We then passed Kaguraden, where people do kagura, a form of music and dance, as an offering to the god in order to fulfill a wish. We didn’t spend much time here.
There is also a building where you can buy amulets (omamori) and get goshuin.
We walked further up to get to Naiku, which was about five minutes from Kaguraden.
Here are the steps leading up to Naiku:
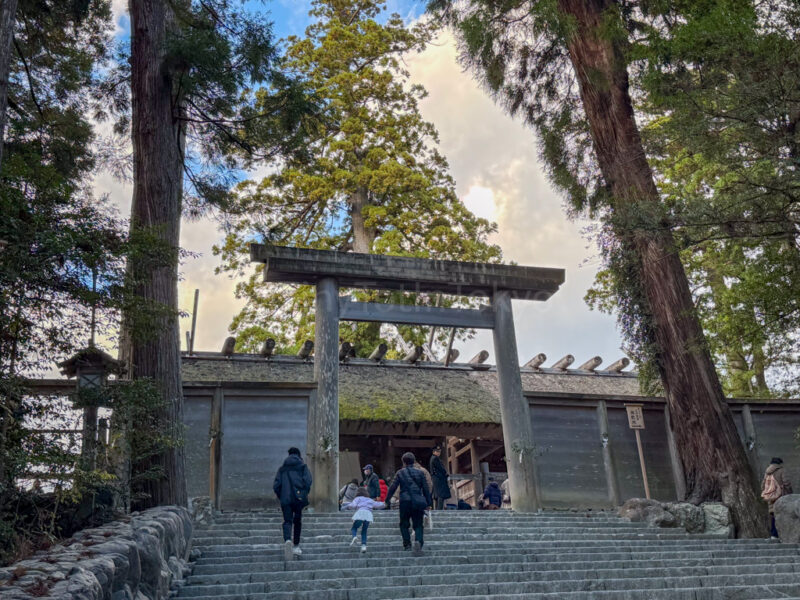
Like the outer Geku shrine, there are strict rules about photography. The closest you can take photos is from the right side at the base of the stairs. Do not take photos once you’re on the stairs. (I was standing far from the steps and zoomed in for the photo above, which is what a lot of people were doing.)
Also, the public cannot enter the main sanctuary of the shrine, which enshrines a symbol of Amaterasu Ohmikami, the Holy Mirror. However, you can pay your respects by giving a coin offering and praying at the area that the public is allowed to enter, which is exactly what we did.
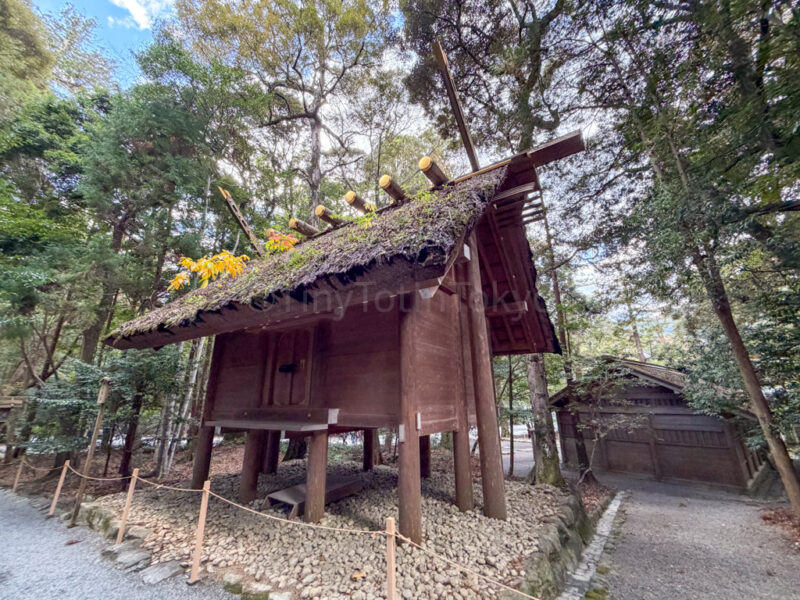
After paying our respects to the main sanctuary, we visited Mishine no Mikura, which is a sub-shrine that stores rice that’s given as an offering to the gods during rituals.
We also went to another sub-shrine, Aramatsuri no miya, which is dedicated to the spirit of Amatsurasu Ohmikami. This is the highest-ranking sub-shrine at Ise Jingu.

Following our visit to that shrine, we crossed a small bridge to go to Kazahinomi no Miya shrine.
Kazahinomi no Miya is a small shrine for gods, a couple, who rule the wind and rain.
The surrounding view here is very beautiful, so we took our time soaking it all in.
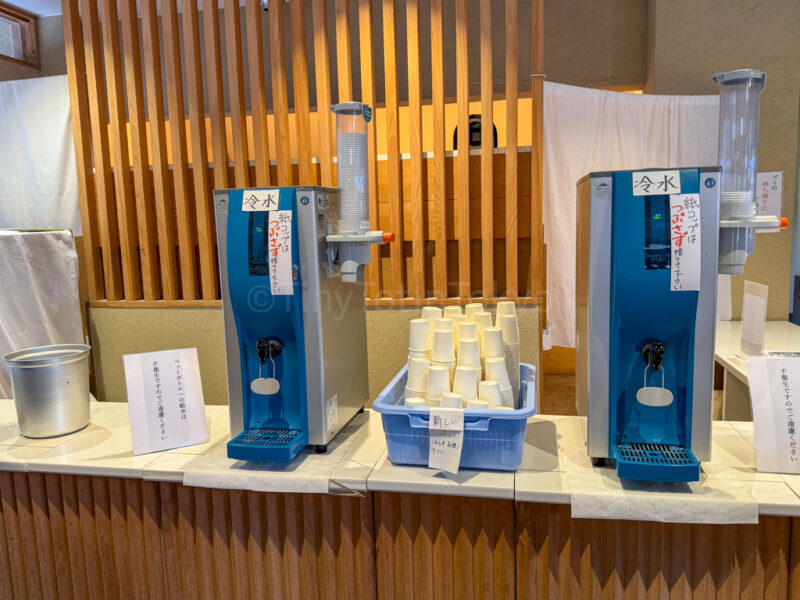
When we were done, we walked to the Sanshuden, which is a rest house near the exit.
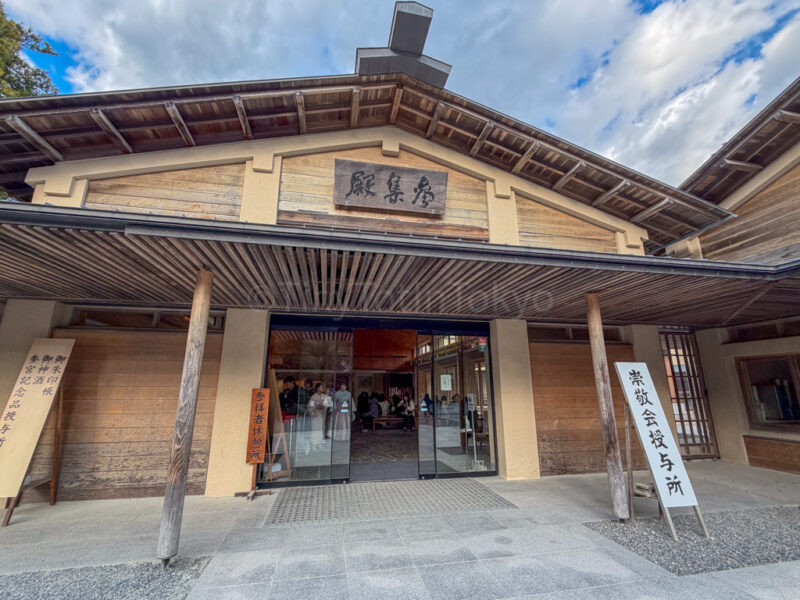
Here you’ll find free drinking water as well as clean toilets.
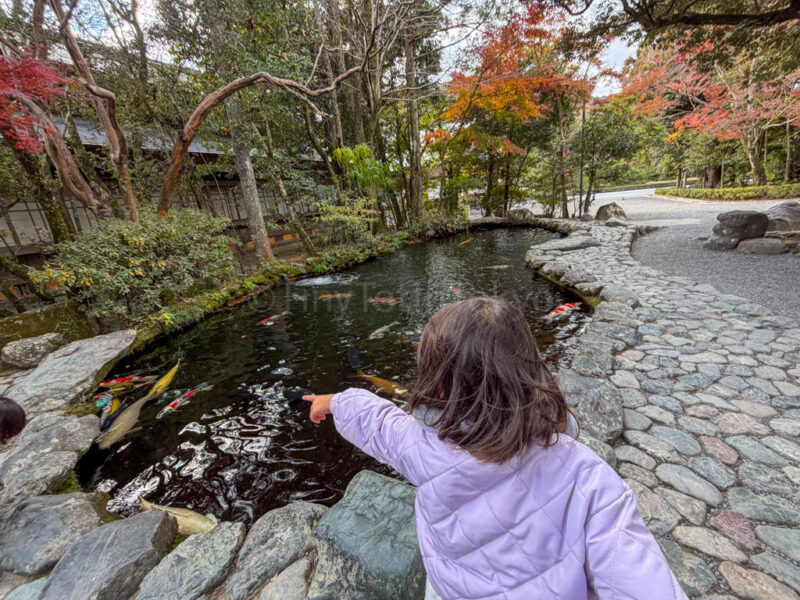
There’s also a pond near here where my daughter was delighted to spot some massive carp, including some golden ones (her favorite).
When we were done, we crossed the bridge again (walking on the right) and then headed to the shopping area outside of Naiku.
Shopping and Food Near Naiku
There is a lively shopping street right outside of Naiku, called Oharai Mura, which I highly suggest visiting if you have the time. Here you’ll find handicrafts and food related to Ise and Mie Prefecture.
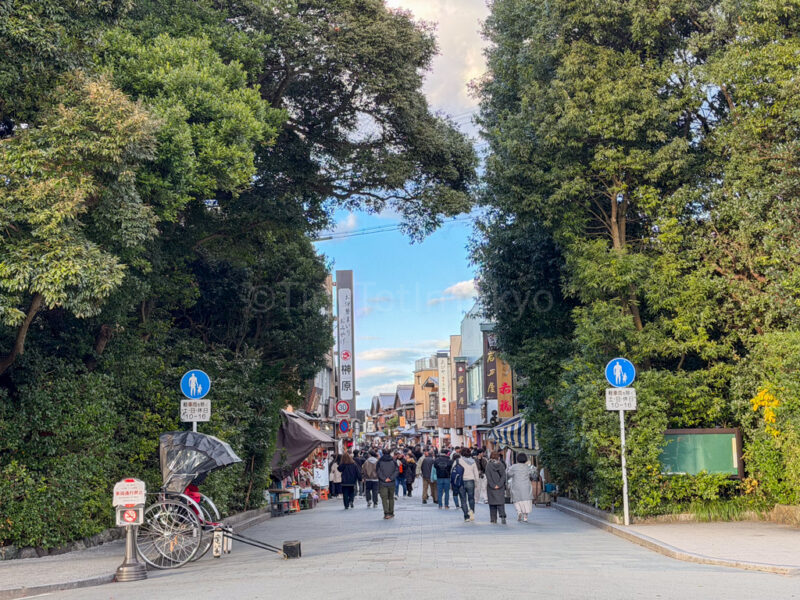
I really enjoyed the traditional atmosphere here, but I was admittedly surprised by how crowded it was on a weekday.
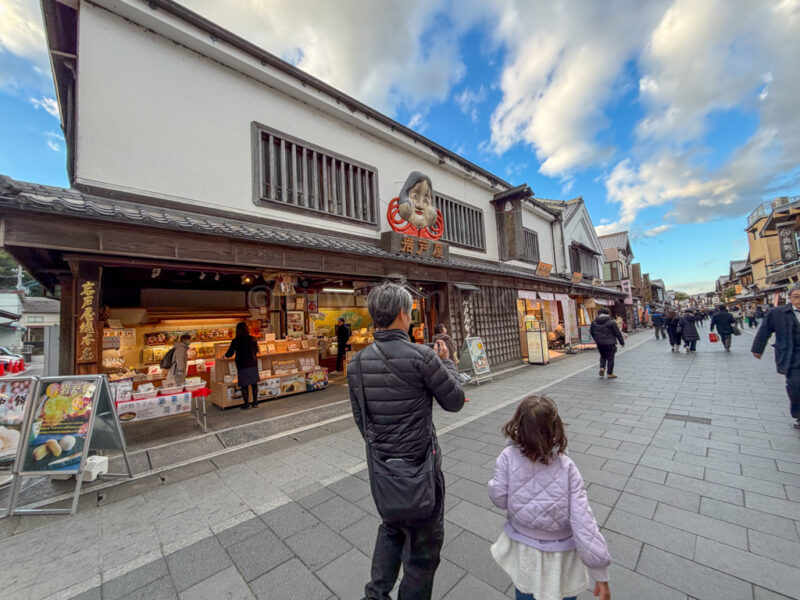
I really loved the vibe of this shopping area, called Okage Yokocho, which was quite traditional with Edo-style buildings and lanterns.
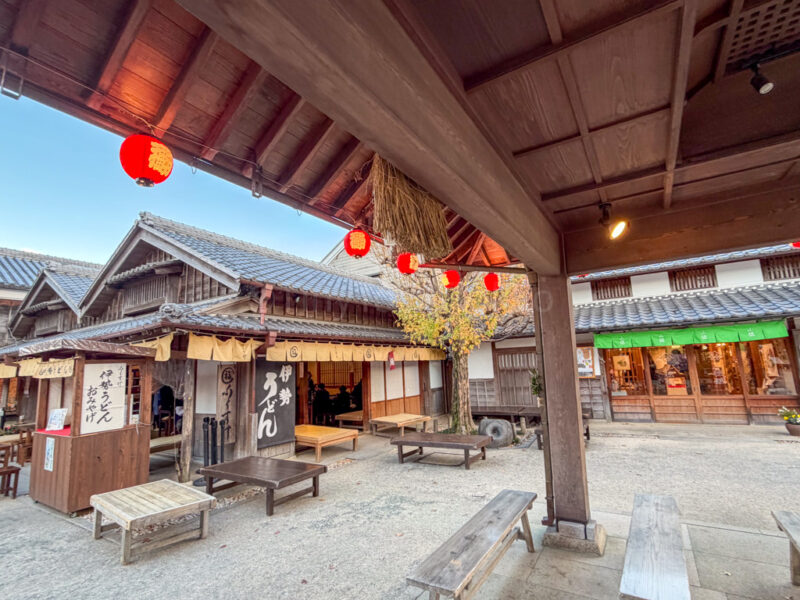
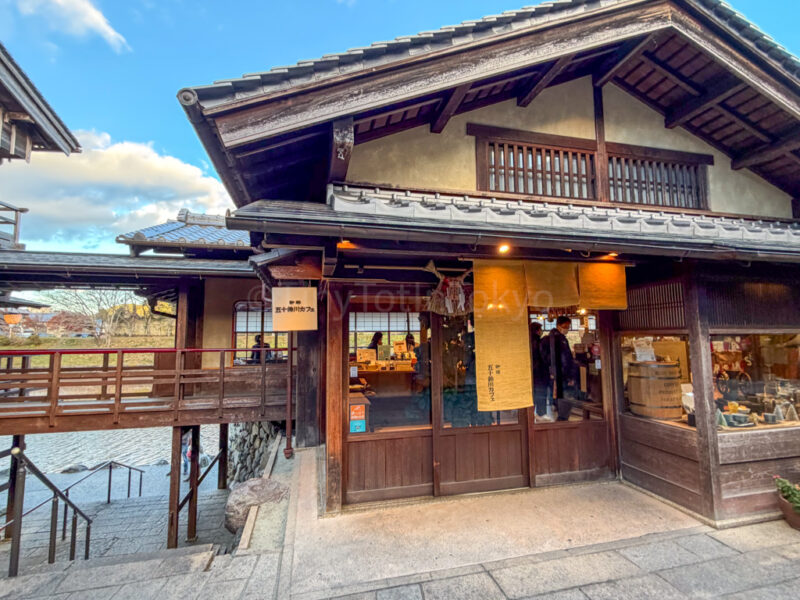
I really wanted to visit this cafe called Isuzugawa Cafe since it looked so cute and has seating facing the river, but we just didn’t have the time. Hopefully you can go!
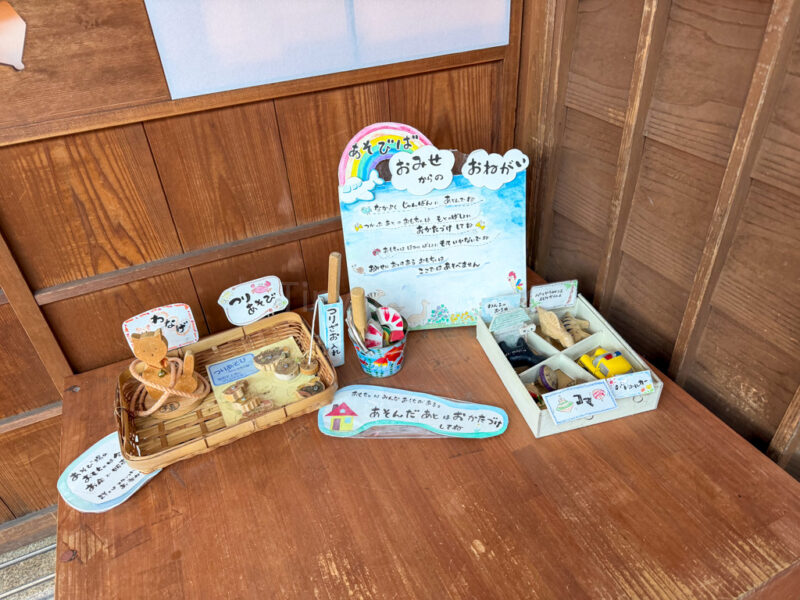
There are some stores like Magonoyasanta, pictured below, selling traditional Japanese toys:
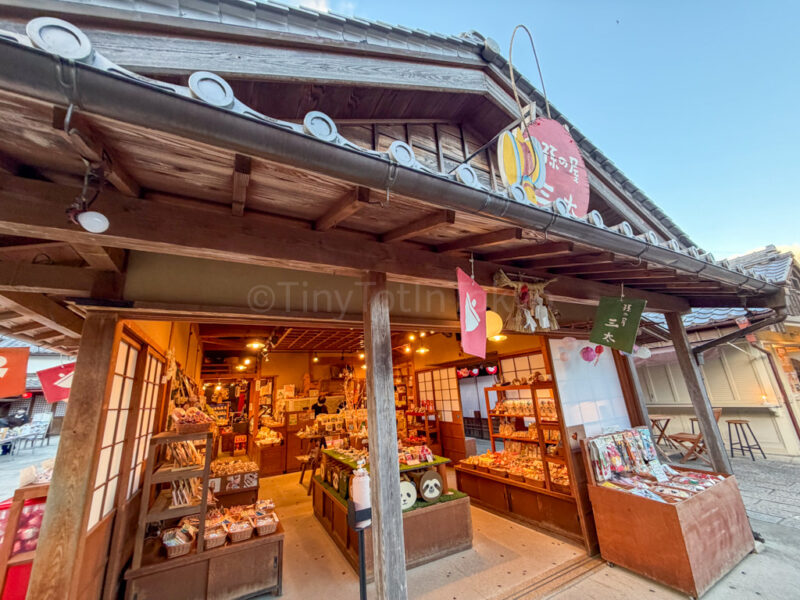
This store also allows kids to try out the toys themselves!
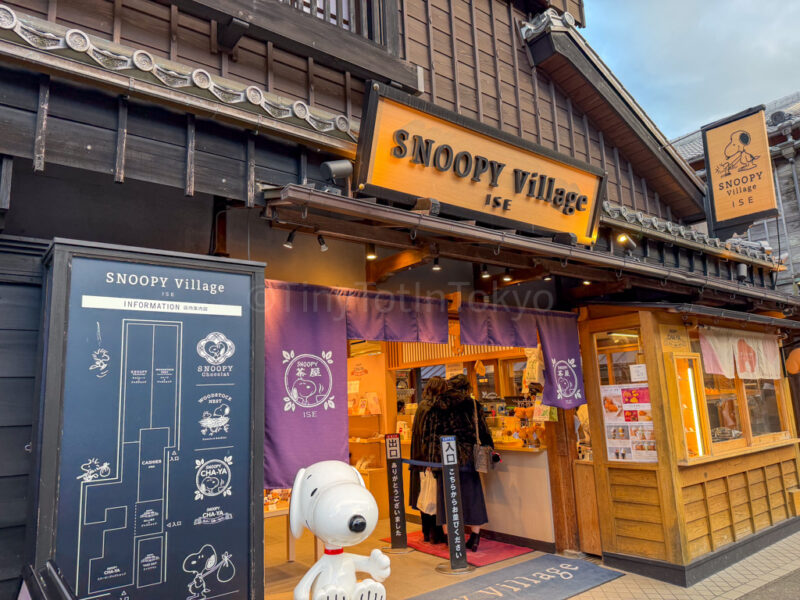
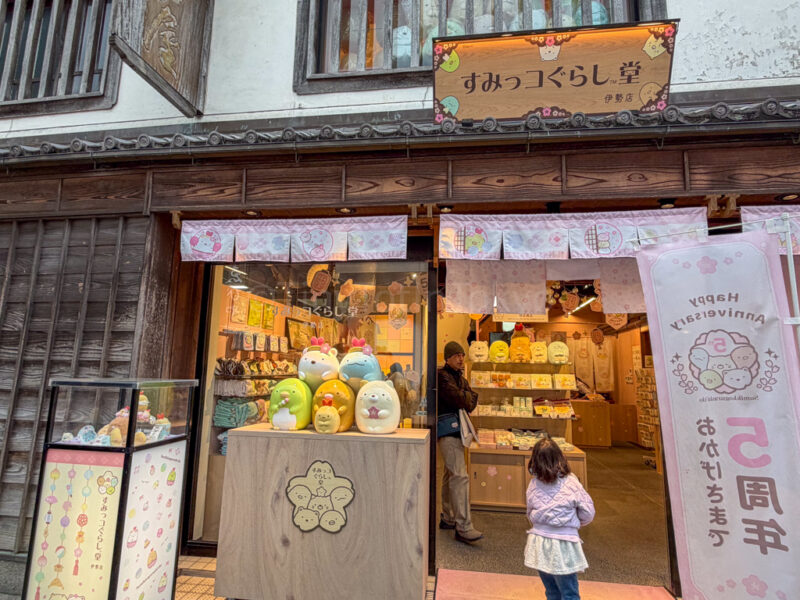
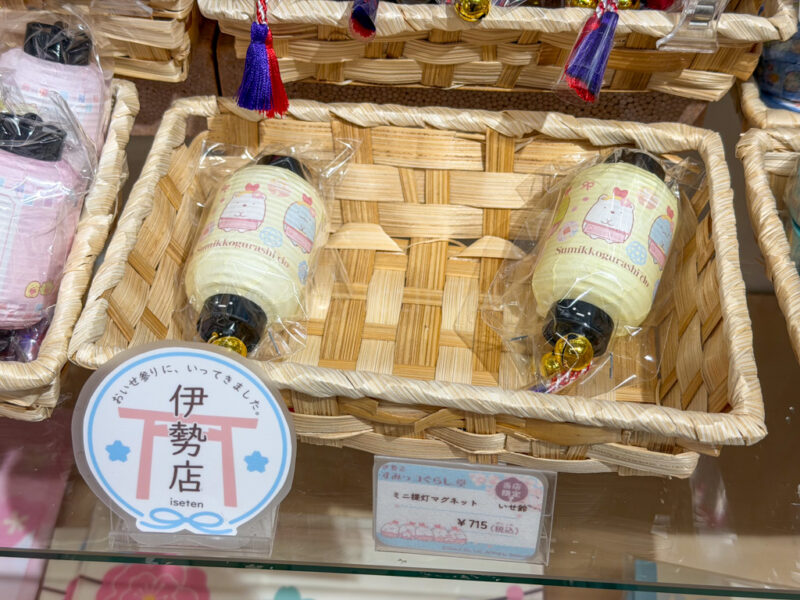
There’s also a Snoopy shop and take-out cafe, as well as a Sumikko Gurashi shop that sells Ise-limited goods.
If you have the chance, make sure to stop by the main shop for Akafuku, a famous smooth red bean paste dessert in Japan. This is normally sold in souvenir shops, but here you can get it freshly made and enjoy it on the spot. If you want to try this, go as early as possible because they sell out fast.
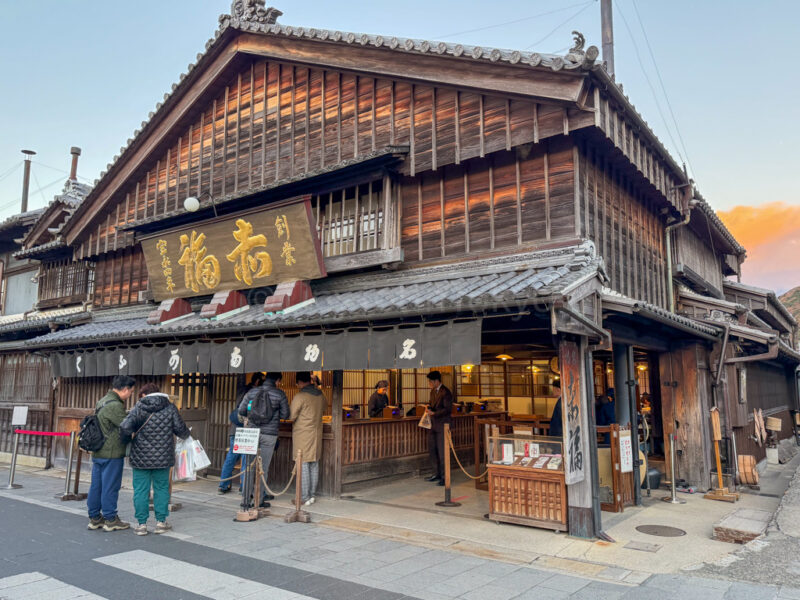
Note that many shops here close by 5 PM.
Visiting Ise Jingu with Kids
My six-year-old daughter visited Ise Jingu with us, and she loved it. Granted, she is Japanese and has been going to shrines and temples ever since she was a baby. Some kids might find it boring, as there’s nothing really “entertaining” here.
But if your children enjoy nature and would be excited to walk through a medieval forest and encounter some massive trees, then I think you should absolutely take them.

I should point out that Ise Jingu is a very peaceful and tranquil place. I don’t think anyone will say anything to you if your kids are playing noisily, but it might bother other visitors in more narrow spaces, especially when you’re near a shrine.
There are lots of rules, too, when it comes to where you can have food and drink, as well as where you can take photos. This might be a challenge when traveling with the family, so make sure you tell your children about the rules beforehand.
There are washrooms throughout the shrine grounds, but don’t expect to find any changing tables.
In terms of strollers, there are stairs in some spots, and some paths are gravel, so I suggest baby-wearing, if possible.
If you’re thinking of visiting Ise Jingu with kids, make sure to read my article about our Mie trip and what else there is to do in the prefecture with children.
How Much Time Do You Need at Ise Jingu?
It took us about three hours to visit both Geku and Naiku at Ise Jingu, and this includes travel between them by car. If you don’t have a car, I suggest giving yourself at least 3.5 hours.
Ise Jingu typically opens at 5 AM and closes at either 5 or 6 PM, depending on the season. There are fewer people when it opens, as well as two hours before it closes.
Rituals at Ise Jingu
If you want to experience annual rituals at Ise Jingu, these would be the days to visit. Expect it to be more crowded than usual, though.
January 1st: Satan-sai
January 3rd: Genshi-sai
February 11th: Kenkoku-kinensai
February 17th: Kinen-sai
May 14th: Kazahinomi-sai and Kammiso-sai
June 15th to 25th: Tsukinami-sai
August 4th: Kazahinomi-sai
October 14th: Kammiso-sai
October 15th to 25th: Kanname-sai
November 23rd to 29th: Niiname-sai
December 15th to 25th: Tsukinami-sai
December 23rd: Tencho-sai
Wrap-up: Visiting Ise Jingu
If you’re looking for a peaceful and spiritual place in nature to pay your respects to Shinto gods, I highly recommend visiting Ise Jingu. It was unlike any other shrine that my family has visited in Japan due to its humble and yet breathtaking appearance.
If you’re interested in knowing what else we did during our trip to Mie Prefecture, read my Mie itinerary.